Monthly Archives: August 2015

Tried & Tasted: Souffle Cheesecake

My first attempt deflated as soon as it cooled. Visually, it was unappealing and I had to eat it with a spoon. But it tasted so good, I had to give it another try. How can cream cheese, white chocolate and egg not combine into a yummy whatchamacallit? Plus, all you need are three ingredients!

Top image: http://bit.ly/1WieKr5

After a few days of mulling over what I did wrong, I figured it wasn’t dry enough. Duh! It might seem obvious but the top was a pretty golden colour and it passed the skewer test. My mistake was covering the cake with a small sheet of foil to prevent burning. I removed the foil after 30 minutes and left the cake to sit in the residual heat, but it never recovered. It just shrank into a sticky pudding.

This time around, I extended baking time by 10 minutes and left it uncovered. The following recipe from cute Japanese blogger, Ochikeron is foolproof. What is absolutely necessary is speed when folding in stiff egg whites. And okay, I cheated by adding ¼ teaspoon cream of tartar to help hold the whites. Get enthused by the Ochikeron video at http://createeathappy.blogspot.sg/2013/05/how-to-make-3-ingredients-souffle.html

Deliciously light and airy, it’s easy to polish off this delicate cake in one sitting, so make two if you’re having friends for tea.

Cheesecake 2Cheesecake 3

As the cake cools, it shrinks from the sides and wrinkles a bit.

Cheesecake 4

JAPANESE SOUFFLE CHEESECAKE

3 eggs (large)

120g white chocolate (I used white chocolate couverture droplets)

120g cream cheese

Method

  1. Separate eggs. Refrigerate whites till ready to use.
  2. Preheat oven to 170˚C.
  3. Melt chocolate in a bowl over hot water. Mix till smooth.
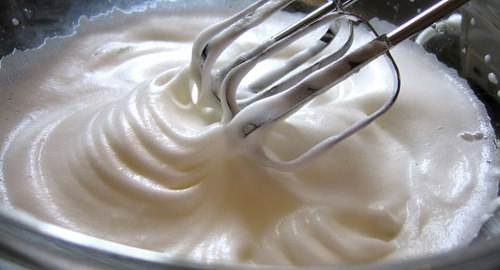
  4. Whisk egg whites till firm. (If using cream of tartar, add when whites are foamy but not yet peaking)
  5. Add cream cheese to melted chocolate, stirring to mix well.
  6. Remove bowl from hot water, add yolks and mix.
  7. Fold in half meringue and then the other half.
  8. Brush oil on parchment paper for lining cake tin so rising cake can slide down without cracking. (I only lined the pan base with parchment paper. The sides, I oiled with cooking spray)
  9. Pour batter into lined tin. Drop the tin on the table gently a couple of times to clear away air bubbles. Place on baking tray and pour hot water in tray.
  10. Bake at 170˚C for 15 minutes (20 minutes), then 160 ˚C for 15 minutes (20 minutes), and finally turn off heat and leave cake for another 15 minutes.
  11. Cool and dust with sugar powder. (As you can see, I forgot to do so!)

Chinese pork jerky treat for dogs

The dogs surround me when I make Chinese pork jerky (bak kwa), shoving each other out of the way, so I can see their “Gimme, gimme, pleeese” expressions. They always get some but I figured I should make the doggy version a little healthier.

I can’t do away with the sugar and honey as the beauty of bak kwa is the caramelised flavour, but I can tweak the amount of sugar and cut back on sodium. It’s still not a treat dogs should eat every day, but it can’t be unhealthier than pet shop treats that come from dubious sources. At least I know my pork jerky has no preservatives and is made with love.

I hear that commercial bak kwa is made with as much as 30% fat, so it stays springy. I prefer to keep within the 10% fat limit for a chewier texture. This means watching grilling time as the protein can turn too hard.

The bak kwa recipe that everyone seems to follow is from Sonia, nasi lemak lover. It’s an excellent can’t-go-wrong recipe – thank you Sonia!! For the people version, visit http://nasilemaklover.blogspot.sg/2012/01/homemade-chinese-pork-jerky-bak-kwa.html

Can you resist this? I can because I don’t eat meat, but it’s enough to start my carnivore friends drooling.

bak kwa Sonia

Here’s Sonia’s recipe, but customised for dogs.

1 kg minced pork (with at least 10% fat)
120 g sugar (brown sugar will do fine)
2 tablespoons light soy sauce
½ tablespoon Chinese rice wine
1 tablespoon fish sauce

2 tablespoons sesame oil
1 teaspoon dark caramel soy sauce or kicap manis
A generous sprinkle of Chinese five spice powder
A dash of Pepper
3 tablespoons honey

Method
1. Put all ingredients in a big bowl and mix with a pair of chopsticks or your hand. Keep turning and stirring the mixture in one direction until the meat feels gluey. Refrigerate for several hours or overnight.
2. Line a baking tray with aluminium foil (for easy clean-up) and spread enough minced pork to make a thin layer. Use your fingers to press and a small rolling pin to smoothen the top.
3. Bake in a pre-heated oven at 160˚C for 15-20mins. Remove from oven. Increase the oven temperature to 240˚C.
4. When cool enough to handle, cut into small squares with kitchen scissors or pizza cutter (I prefer scissors so as not to damage the foil) and arrange (bottom-side up) on the same baking tray.  If there’s any marinade in the tray, brush this on the jerky squares.
5. Grill (top heat only) at 240˚C for 10 mins. People who like charred edges can flip the pieces and continue grilling for another 7 minutes. Not necessary when cooking for dogs.

4. When cool enough to handle, cut into small squares with kitchen scissors or pizza cutter (I prefer scissors so as not to damage the foil) and arrange (bottom-side up) on the same baking tray.  If there’s any marinade in the tray, brush this on the jerky squares.
5. Grill (top heat only) at 240˚C for 10mins. People who like charred edges can flip the pieces and continue grilling for another 7 minutes. Not necessary for dogs.